Published April 18, 2021 04:00PM
The 30-Day Pull-Up Progression Program
Can't do a pull-up? Never fear — this program will have your chin up (pun intended) in no time.
Pull-ups are notoriously intimidating, especially to women. And although we think of pull-ups as a strength exercise for back and biceps, they actually recruit many more muscles and require a lot of endurance — and if there’s one thing women are great at, it’s endurance. So you can absolutely master this move: Just shift your focus from simply getting your chin over the bar to teaching your muscles the proper mechanics, and you can push past any pull-up plateau and hit your goal with ease.
The bad news is that in order to master the pull-up, you have to actually do pull-ups. According to the law of specificity, you get better at what you practice, and while lat pulldowns and rows may seem similar enough, the biomechanics of a pull-up involve more musculature and coordination than a machine or cable exercise. Research validates this statement, indicating that neuromuscular adaptations don’t transfer well from a pulldown to a pull-up, especially for women. In one study of female swimmers, the athletes’ lat-pulldown prowess had very little correlation with their pull-up abilities. Furthermore, the women with a higher total-body mass (fat + lean) had reduced pull-up capacity, and even though they could crank out heavy pulldowns, they floundered on the bar.
Since the only weight you’re lifting here is yourself, how quickly you adapt will somewhat depend on your own strength-to-weight ratio, even if that weight is mainly muscle mass. And if you have a smaller frame, you might be a natural because your weight is light in relation to your strength.
ADVERTISEMENT
In order to gauge your starting point, do a self-test: Hop on the bar and see just how many strict bodyweight pull-ups you can do. If you get none, no worries: Set a goal to hit five by the end of the program. If you can get a couple, great! Aim to add two, three or even five reps to your total.
This program implements four techniques to improve your pull-ups, helping stave off boredom and frustration while moving ever closer to your ultimate goal.
No. 1: Be Negative
A negative (eccentric) contraction is the part of a rep where your muscle lengthens; the concentric (positive) contraction is where your muscle shortens. Your muscles are capable of generating more force during an eccentric contraction than during a concentric one, meaning you can lower more weight than you can lift. In fact, you can most likely complete multiple negative pull-ups right here and now, even if you can’t get up to the bar by yourself. This biomechanical phenomenon makes negatives the perfect technique for those who can’t do a single pull-up, building strength and control in both the primary and secondary muscles.
No. 2: Keep It Strict
Ultimately, strict, pristine pull-ups are your goal. That means no swinging, kipping or flopping about under the bar like a hooked carp in order to clear your chin. Yes, kipping pull-ups are a bit easier from a strength standpoint because they use momentum to propel you upward, but if you don’t have a strong strict pull-up as your base, you are more likely to get hurt. The strength and stability of your shoulders and core have to be on point before you start adding momentum, so for now, stick to strict. Once you’ve mastered that, everything else is cake.
ADVERTISEMENT
No. 3: Accessorize — Afterward
Although pull-ups primarily demand back strength, your pectorals, serratus anterior, levator scapulae, rotator cuffs, biceps, brachioradialis and forearm flexors all participate in moving you upward to the bar. Performing accessory exercises like a push-up plus, a banded shoulder extension and grip training can help strengthen these muscles, making pull-ups more possible. Do these kinds of moves using a light to moderate resistance and perform two to three sets — only after your pull-up work is completed.
No. 4: Super Bands?
Purists maintain that using super bands during a pull-up is contraindicated because you’re not truly pulling your full bodyweight. And it’s true that the bands provide the most assistance at the bottom of a pull-up where you don’t need much help rather than in the middle where your sticking point lies. However, bands are good for training endurance, allowing you to get in more reps than you could without one, adding volume to your program. Volume means strength, and strength means accomplishing more pull-ups.
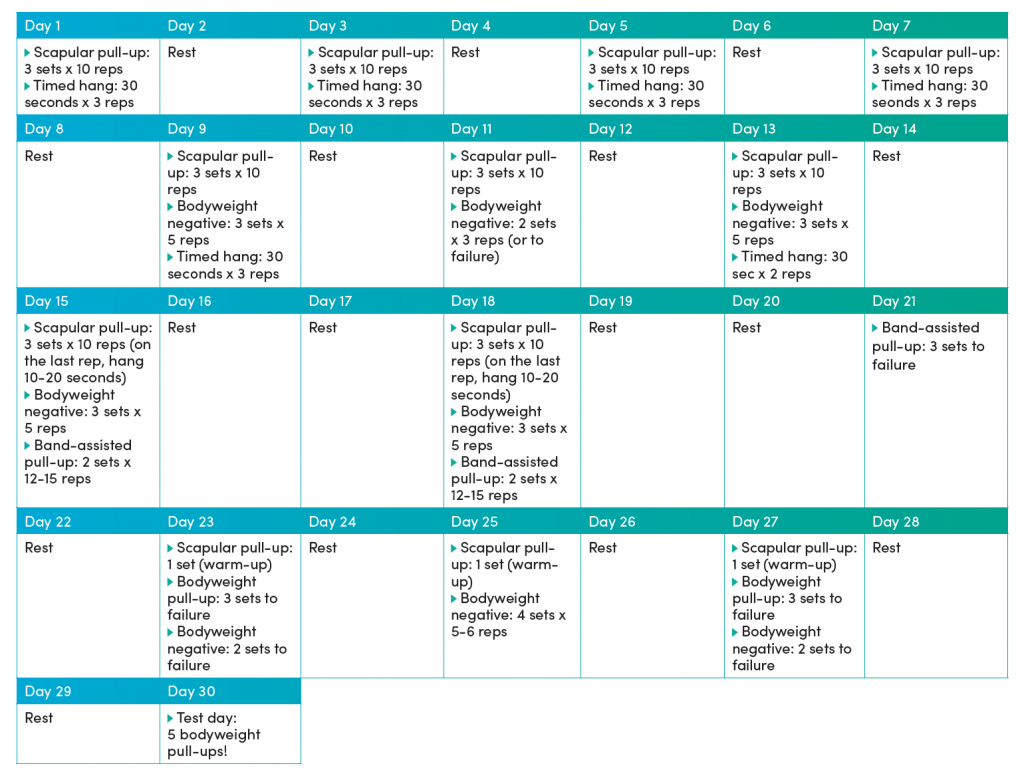
The 4-Week Program
Now it’s time to become queen of the bar. These progressive pull-up workouts can be done every two to three days, either alternating with your regular workouts or added onto an upper-body or back day. Here is how the plan breaks down:
Week 1 focuses on recruiting the proper stabilizing muscles, etching a biomechanical pattern in your brain and body, while also training your tendons and ligaments to support the pull of your bodyweight on the bar.
Week 2 uses negative reps to stimulate both your primary and secondary muscles, recruiting more muscle fibers and building the strength you’ll need to hit your goal.
Week 3 adds band-assisted pull-ups to the plan to build endurance and resistance to fatigue — both of which you’ll need to push past your plateau.
Week 4 tests your mettle with a few sets of bodyweight pull-ups to failure — using excellent form, of course. And on Day 30, you’ll retest yourself with your targeted number of perfect pull-ups and see how far you’ve come!
For all workouts, rest one to three minutes between sets. For all exercises in the workouts, use these cues to set up properly:
- Take an overhand grip on the bar just outside shoulder width.
- Wrap your thumbs around the bar for safety.
- Imagine “crushing” the bar in your grip to create muscular tension.

ADVERTISEMENT
Timed Hang
Your grip is often the weakest link in your pull-up chain. Timed hangs train you to hold your bodyweight and withstand the pull of gravity.
Stand on a box underneath the bar and assume the proper grip on the bar. Pull your shoulder blades down and back, and keeping everything tight and contracted, lift your feet off the box to hang freely underneath the bar for time.
Scapular Pull-Up
This move teaches your stabilizing muscles to properly engage, strengthening them and helping forge a biomechanical pathway in your brain.
ADVERTISEMENT
Grip the bar and hang underneath it freely, relaxing your shoulders and shoulder blades to come into a dead hang. From there, pull your scapulae down and back, drawing them in toward one another to lift your body up several inches while keeping your arms straight. Hold briefly, then return to the start.

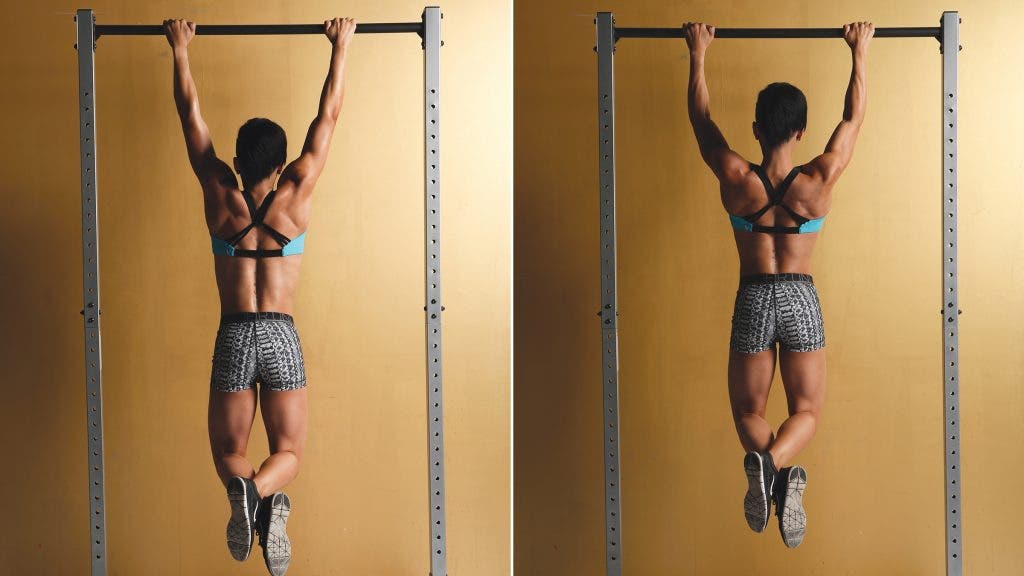
Negative Pull-Up
Negative reps will help you achieve the strength and neuromuscular recruitment required to perform a strict pull-up.
Stand on a box and take the proper grip on the bar. Jump straight up to get your chin over the bar and hold here, elbows down and shoulder blades retracted. Lower down slowly, taking as much time as you can to descend, even pausing at different levels if you can manage. Drop from the bar, shake out your arms and then repeat.
Note: Because they’re so intense, negatives might make you super sore. If you’re wrecked from a previous negative session, take another day off to fully recover and prevent injury.
ADVERTISEMENT
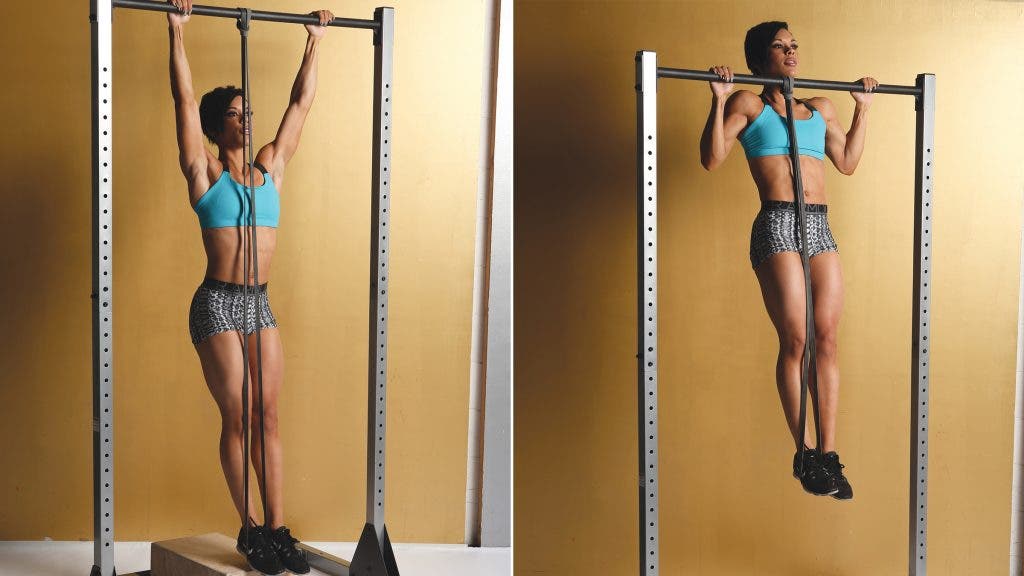
Super-Band Pull-Up
If you avoid momentum and perform your reps slowly, bands can help build muscular endurance.
Secure a super band around the bar by looping it through itself. Then assume your grip on the bar. Place one foot (or knee, depending on band length) inside the band loop and hang from the bar. Note how the band offsets some of your bodyweight. Now draw your shoulder blades together and drive your elbows down to pull yourself up toward the bar. Pause and squeeze hard before lowering to the start. Switch the banded foot/knee every other set.
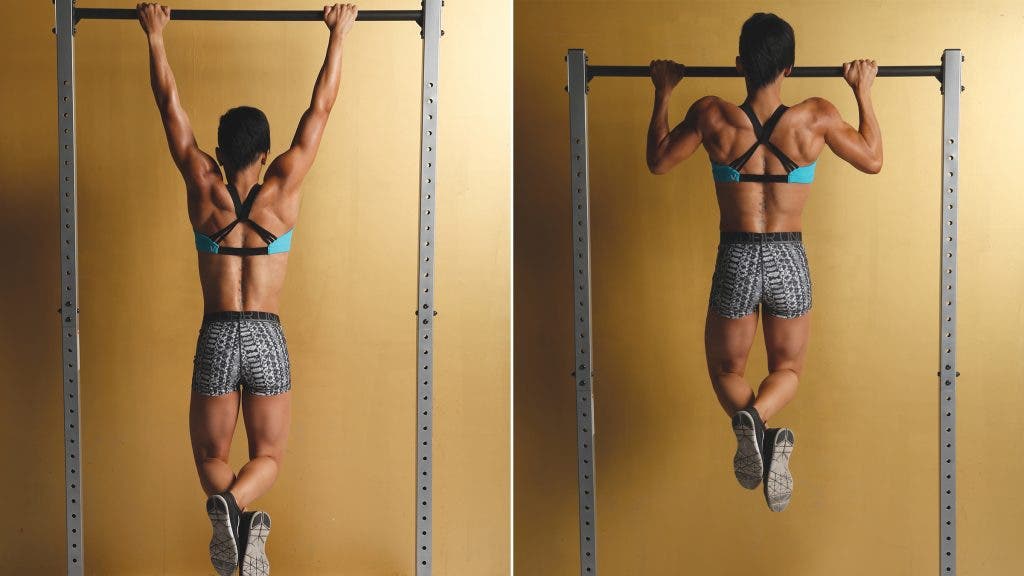
Bodyweight Pull-Up
Remember — perfect practice makes perfect! A smooth, controlled path up to the bar and down again is your aim.
ADVERTISEMENT
Assume your grip on the bar and hang underneath with your legs straight or knees bent and crossed behind you. Draw your shoulder blades together and drive your elbows down to pull your chin up over the bar. Slowly lower yourself back to the start and repeat.
Chalk or No Chalk?
Chalk is used to reduce the friction between your hands and the bar, and it can be great for movements where a barbell is supposed to move in your hands, as with a snatch, or exercises where your hands are supposed to rotate around a fixed bar, as with a bar muscle-up. Since your hands shouldn’t move much during a pull-up, chalk is optional. It might be of assistance if you’re prone to sweating or have calluses: A light coat of chalk can help protect your hands and prevent them from ripping.