Published November 22, 2019 09:00PM
Build a Better Squat: Part 1
Genevieve Gyulavary, a physical therapist and athlete, has a passion for proper form — especially when it comes to achieving your squat goals.
Writing a single guide on squat mechanics could easily turn into an endeavor the length of a book. Here, we’ll touch on some of the main mechanics to get you squatting like it ain’t no thing, with a ton of different variations tailored to your current level.

Build a Solid Foundation
As a physical therapist and athlete, there is no stronger cause I have than encouraging my clients to build a strong base. If it looks bad or worse and if it feels bad, something isn’t right. First, move well.
A beautiful air squat is a head-turner where I come from. Performing a basic air squat is something that is a necessary and functional component of everyday life. Think getting in and out of a chair or picking something up off the ground (like your kids). Spending time working on your squat within a pain-free range not only will build better glutes but also will ensure the long-lasting health and longevity of your lumbar spine.

Basics to look out for:
- A vertical shin tracking along the outside of your big toe.
- A neutral spine
-
- Excessive flexion and hyperextension can signal a weak core.
- An upright chest
-
- Excessive rounding at your midback (thoracic spine) can signal a weak posterior chain (traps, rhomboids, erector muscles) or a lack of joint mobility.
- Weight in your heels
-
- This will turn on your glutes and engage your posterior chain, an issue seen frequently because of sedentary work and commuter life.
- Knees out
-
- Think “spreading the floor” with your feet to prevent any collapse at the knees to compensate for hip weakness.
Progress Over Time
Here are a variety of squat variations that will allow you to progress over time without sacrificing form:

ADVERTISEMENT
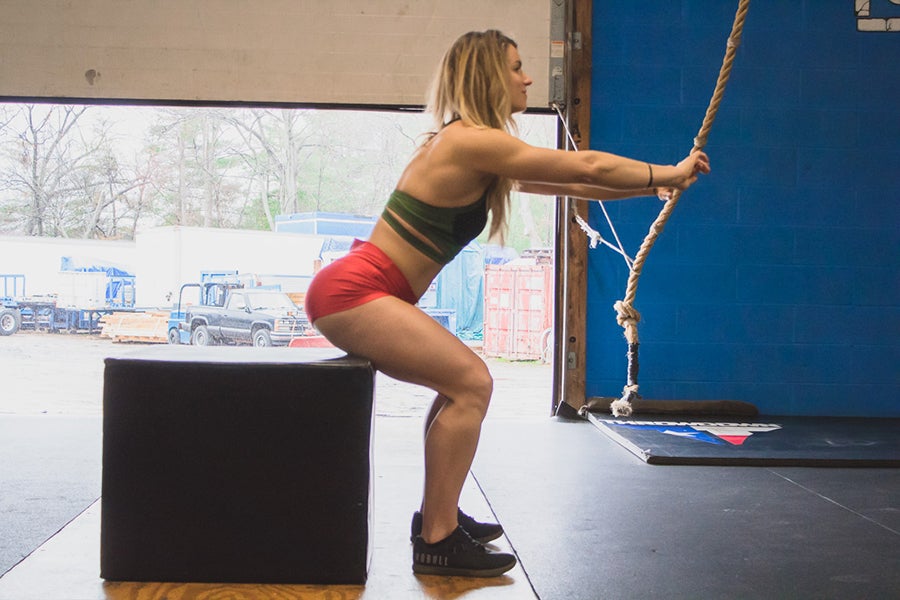
Start With a Box
Start here. Squat to a box to reduce your range of motion and focus on mechanics. Depth will come. Find a pain-free range of motion that works for you. If there are no mirrors in your gym, film yourself. I do it all the time when I’m performing technique-driven lifts to look at my form and mechanics. If something still looks off, show the video to a coach or a physical therapist who can offer additional cues to improve your form.

Move to a Medicine Ball
Progress from a tall box to a lower surface like a medicine ball.

Incorporate Load
Add a kettlebell or a dumbbell, keeping the weight in front of you at your chest. Please note: Adding load is one of the final progressions because it can drastically change the mechanics of your movement. Starting off conservatively with a light weight is best practice as you gradually build muscle memory. Adding load before you’re able to air-squat efficiently and with some degree of virtuosity can ultimately lead to injury and pain down the road.

ADVERTISEMENT
Add a Barbell
Kettlebells and dumbbells do not require such a strict front rack position. Once you add the load of a barbell to a front squat, it’s important to be able to maintain active positions in your thoracic and lumbar spine. Limiting factors can either be stability (lumbar and thoracic) or mobility, specifically at the shoulders. Without this prerequisite control, the weight will pull you forward and out of these strong positions, breaking tension and promoting injury. Spend time with just the barbell in the squat, pushing your elbows up to get comfortable here before adding any load.

Add Pauses
I am a huge fan of time under tension. Add some pause squats into your routine (three, two, one holds in the bottom of the squat, first without load, then with load) and watch your squat form become #unicorn magical.
Five-Minute Warm-Up for Squat Therapy
This progression is so much harder than it looks. I swear you will be sweating. All you need is a wall and a medicine ball. The goal here is to help you understand what it feels like to maintain neutral spinal positions, also known as “squat therapy.”

Begin with some good distance between you and the wall, about 1½ feet.

Squat down using a 10-second descent, keeping your arms in the position depicted above. The wall will make it impossible for you to have anything but a neutral spine. You will fall out of the position before your back will round.
ADVERTISEMENT
Warm up by doing 10-second descents 10 times.

If you can’t get to depth without falling over, if you feel more comfortable with a target or if you don’t understand what full depth (90/90) feels like just yet, add in a medicine ball. The security of knowing where to go can make it easier to effectively do this drill.

As you progress, get closer to the wall, about ½ a foot, as seen here.
